Saturday, March 14, 2020

Essential Tools For The Ultimate Home Workshop

Do you love spending your weekends in your garage, working on your inventions? Are you thinking of building a home workshop that’s all yours? Or confused about upgrading your existing garage workshop?

Well, to make it easy for you, we have enlisted the best tools that you should most definitely invest in!

For anyone with a knack for DIY projects, some extra garage space, and a handyman persona, nothing is more satisfying than a fully stocked home workshop.

Our list of hand-picked tried and tested tools and gadgets will keep your home workshop up to date with the latest inventions alongside making work more comfortable and efficient.

Let’s begin with the basic, yet the most Essential Home Workshop Gadgets:

Stanley 1500-Lumen Portable Lighting System

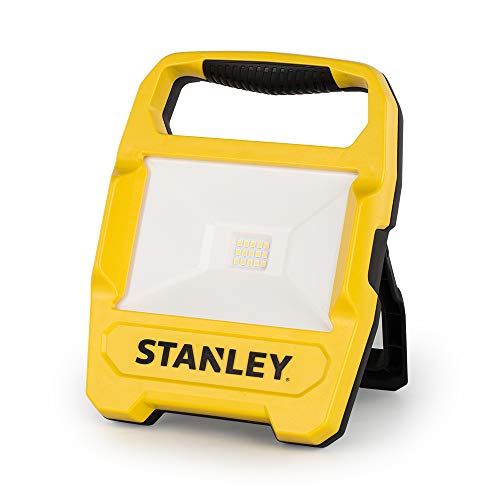
First off, for absolutely any kind of workshop related work or DIY project, clarity is vital. For the purpose, you would require a sound lighting system around you, to make sure your work is precise.

This portable Stanley Lumen 1500 Lighting system, is a lightweight, long-lasting led light that comes with a stand. You can use it to hover over your workbench, stand in the corner of your garage or place on the inside of your car’s bonnet.

Either way, the lighting system is compact enough not to burden your storage facility, all the while providing extra bright luminescence.

Learn More


Masterplug 60ft Heavy Duty Extension Cord Open Reel with 4 120V / 10 amp Integrated Outlets

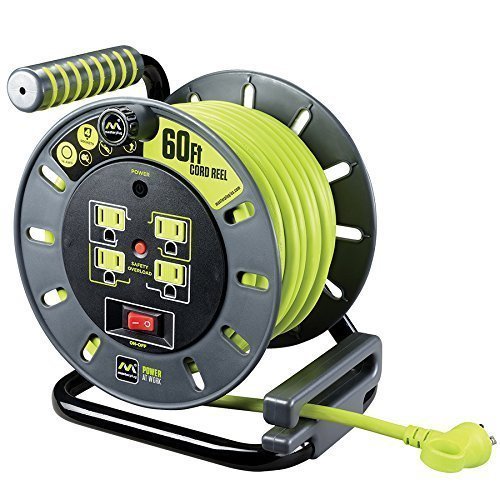
Adding to the basics, a well-built home workshop must include enough power outlets and sockets around for efficiency and ease of work. Since workshops require a lot of machine work, and at times not having the right type or number of power outlets can slow your work down.

If you don’t have enough in-built power sockets, no need to fret, this Masterplug heavy-duty extension cord reel, works like a charm. The reel is portable and can be used anywhere. Its heavy-duty metal steel drum exterior provides additional security for the most strenuous tasks and is compatible with a variety of wall brackets.

The pull-out drum wind handle enables quick winding of the high visibility cable with increased speed and control. The safety thermal power cutout with an LED indicator prevents the cable from overheating when fully reeled.

It also allows you to reset if a cut-out occurs and the power switches let you control the power where you are working. The 60 ft extension works wonderfully within the workshop space even if you have only one power source within the space.

There are other variations of the same product that can be bought for a slightly lower price but with a shorter cord.

Learn More


Dewalt 18/20v Max Vacuum

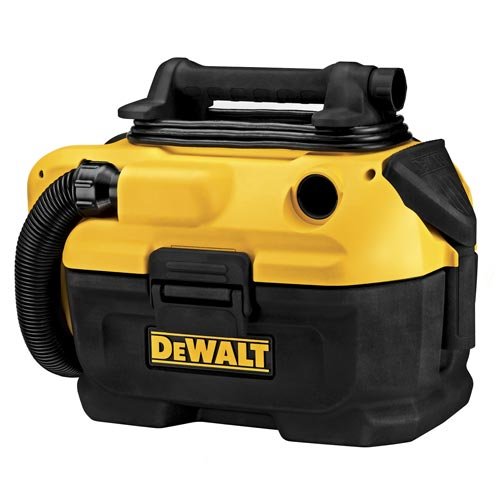
Home workshops tend to get messy because of all the woodwork and the sawdust. The part where you have to clean it up is a headache!

This is where the Dewalt Max Vacuum comes in handy. It is almost impossible to use a mop to clean up the mess caused by workshop machinery and tools. The DeWalt vacuum helps tackle the problem with ease.

This specific Vacuum cleaner includes HEPA rated filters that trap dust and scraps with 99% efficiency. It also works with the suctions liquids, making the clean-up process easier and extremely efficient.

This portable vacuum cleaner is rechargeable and cordless, which makes it the most practical and extremely easy to use.

It’s rigid exterior and interior makes it capable of sucking in sharp or rigid objects, without damage.

Last but not least it is a washable device that makes it all the more in-demand.

Learn More


Goplus Service Tool Cart

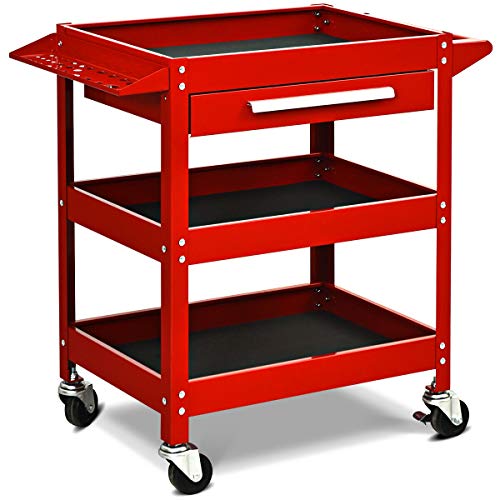
The Goplus Tool cart is a great way to work around storage ideas for the workshop. The cart is a practical solution as it can work as a tool storage compartment and at the same time, be rolled around at any corner of the workshop without any difficulties.

The cart is built with heavy-duty steel, making it super durable. It features a weight capacity of up to 330 lbs.

The multi-storage design includes three trays with wear-resistant cushions, a sliding utensil drawer, a convenient plug for carrying small parts, and an ergonomic handle. You’re free to store and transport everything at once without needing extra help.

To add more, the cart is extremely easy to assemble; the pre-punched mounting holes save you a lot of assembly time and the need for more hardware.

Now let’s move on to some advanced tools and gadgets. If you are someone who’s into construction and working with materials like metal and wood, the following few products will be of your interest.

Learn More


Hobart Champion 145 Welder/Generator

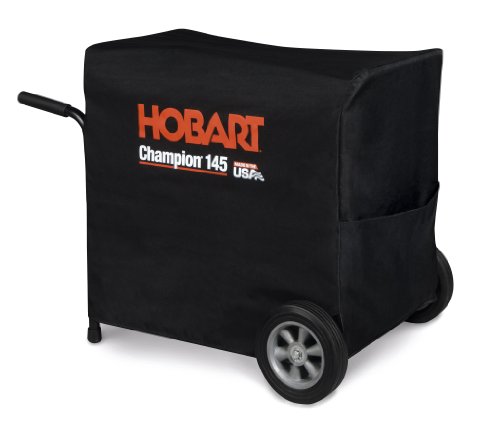
This stick welder/generator offers an all-in-one solution for portable power and welding, up to 4,500 watts. Welding can be used for numerous purposes, from iron repair to creating something out of metal sheets or wires.

If you’re an artist and you use your garage workshop as your studio to create art, a welding machine will aid you with your sculptures and maybe even give you more freedom to work or experiment with different materials.

Why specifically the Hobart Champion 145?

Because welding is a common practice, however, it is still used less frequently. Anyone investing in a sole welding machine would have second thoughts, the Hobart champion 145, is not only just a welder; instead, it can act as a generator to power your tools.

One of the best qualities of this specific welder is that it is built for indoors. The welder comes with a large muffler, which inhibits noise and allows a quiet working environment.

Learn More


Bosch Blaze GLM 50 C Bluetooth Enabled 165’ Laser Distance Measure With Color Backlit Display

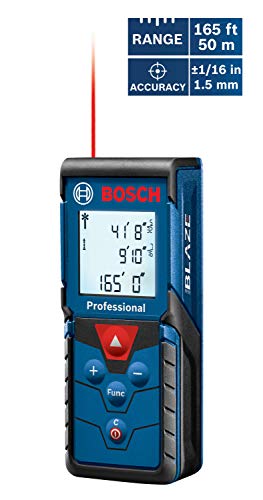
With the advancement of technology, regular carpenter tapes might go extinct because of the use of laser lights as a means of measuring objects.

The Bosch Blaze Laser distance Measure Tape measures precisely with the use of a single ray of light. It features long-range measuring with extreme accuracy and measures distances from up to 165 feet to within 1/8 inch.

It features Bluetooth functionality to conveniently transfer and store measurements from the laser tape measurer to a smart device via the Bosch app. It is compact and very easy to carry around and requires very little storage space. It is quite literally a pocket-sized device.

It also provides default real-time measurement that adjusts as you move closer and farther from the target, just like a tape measure. Measuring Accuracy is Typ. +/-1/16-in (1.5 mm).

Learn More


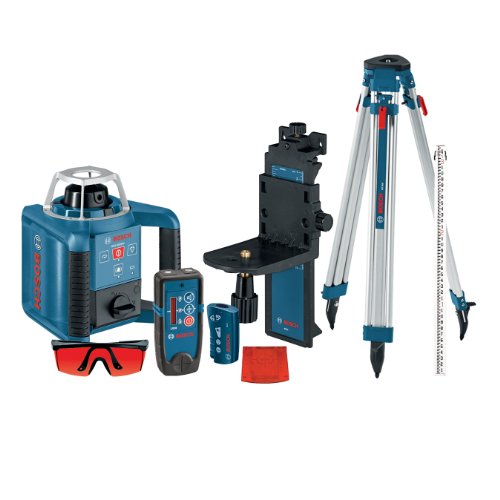
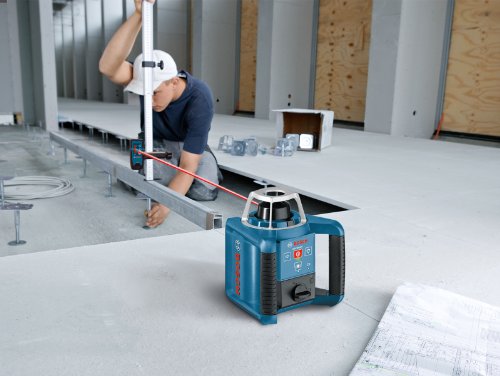
Spectra Precision Laser LL300-4 Automatic Self-Leveling Level W/HR350 Receiver, Nicad Rechargeable Batteries

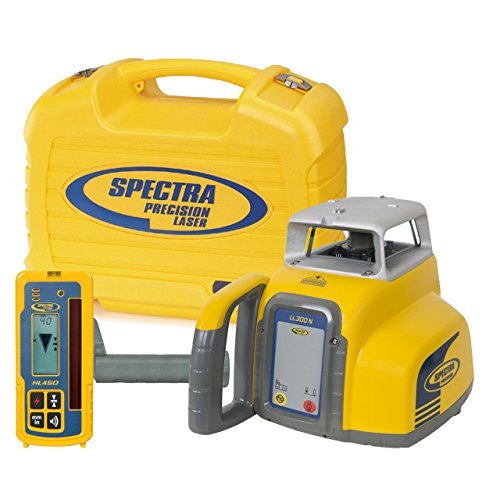
A laser level is used to create horizontal and vertical lines across fields or within your space to help precisely work your way through a project. The Spectra Precision Automatic Laser level uses single beams of light to allow easy and precise leveling to be it for a construction site or just a small DIY project.

This kit includes the HR350 or HL450 Receiver, which can be used as either a hand-held or rod-mounted unit for basic leveling and alignment jobs.

Exceptionally easy to use, the HR350 or HL450 displays the beam elevation from both the front and backside of the unit, so it’s easy to determine on grade, even under the poorest job site conditions. It also features durable composite housing that’s both lightweight and capable of withstanding drops from up to five feet (1-1/2 meters) onto concrete.

The self-levelling, laser level would be a great addition to your workshop. It is fairly compact and allows work efficiency to boost up.

Learn More


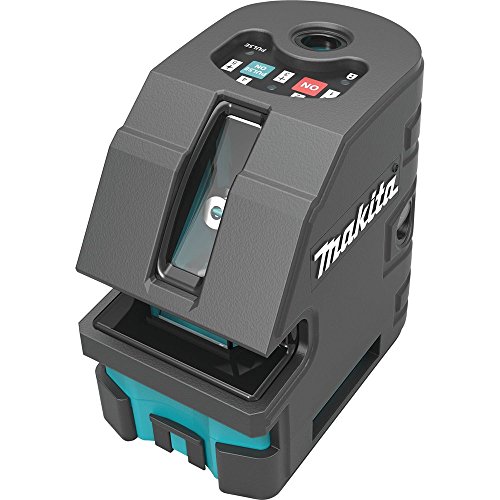
General International Ms3005 10″ 15a Sliding Miter Saw

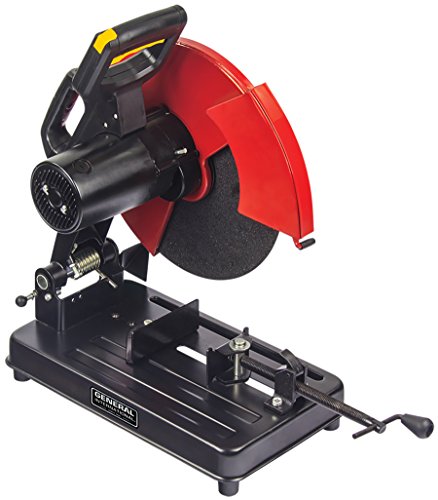
Every crafty hand man works with wood and metal. The only satisfying thing for them is something that cuts through the rigid materials with accuracy, precision and minimal physical efforts.

Here is where the Sliding Miter Saw comes in handy. It effortlessly slices through aluminum, wood, and plastic. The accuracy and precisions come through with the use of its laser alignment system, which slices and cuts through in proper verticals and horizontals.

The exterior of the saw is rigid for protection and also comes with extension clamps, which allow the saw to fit on any flat surface. Along with these, it also has a dust bag, which vacuums all of the dust and scraps while doing its job.

It also includes a stabilization bar that inhibits any extra movement which could interfere with the process of precisely slicing through the materials. All in all, the features of the saw make it a great fit for an indoor home workshop.

Learn More


Now, let’s move on to the Most Important Tools for every workshop:

Protective Gear:

When it comes to building a workshop, we enlist the most eligible products available on our wish list, but what we don’t think much of are the protective gear that is as important and necessary as that table saw or a laser tape measure.

Basic protective gear includes 5 things:

Safety glasses:

Sawing, welding, hammering, all result in the falling of debris. Safety glasses help protect the eye by not letting any particle or chemical fall into the eye or its surrounding area.

Safety glasses come in a variety of designs and materials all depending upon your use. The most popular lens material though is polycarbonate.

It is a soft lens material that is lighter than glass, hence is widely preferred. However, it’s softness makes it less scratch resistant.

Hearing protection:

Working with heavy machinery means loads of noise pollution, which if not now but in the long run, can aid in hearing loss. Hence, it is highly necessary to keep your ears protected.

Hearing protections come in two main different forms: earmuffs and earplugs. Earplugs are known to be better at protecting the ear and are also easier to carry and wear. They come in both reusable and disposable forms.

Earmuffs nonetheless work amazingly well too when it comes to cancelling noise. They also provide entertainment while at work and can be synced via Bluetooth to your phone, making receiving calls easier while working.

Respirator:

Respirator or in lay man’s terms a dust mask is as essential when you are working with or around wood. The tiny particles of sawdust can cause havoc on the system. Especially those who have weak lungs, a dust mask is a must-have.

Dust masks also come in all sorts of qualities and varieties. According to your workload and level of tolerance for sawdust, you can either choose a general disposable dust mask or pick a heavy-duty full-face powered respirator.

Work Gloves:

Working with machinery like saws and materials like wood and metal, you must own the right pair of work gloves that protect your hands from the usual wear and tear.

Work gloves come in all sizes and shapes; the best are made from polyurethane and coated with nylon for extra protection.

Work boots:

Just as any other protective gear is important, work boots are as necessary, especially if your work requires constant standing.

Owning a good pair of work boots can take away years of muscle trauma and weakness. Not only this It can strengthen your posture and help boost your work skills.

We hope that this list helps you find the right element for your workshop at home, and helps with the overall efficiency and quality of your work.

The post Essential Tools For The Ultimate Home Workshop appeared first on Top Laser Levels.


source http://www.toplaserlevel.net/essential-tools-for-the-ultimate-home-workshop/

Thursday, December 26, 2019

How to Install Base Cabinets: Get Your Shimmy On

How to install base cabinets

Precise measurement.  Efficient shimming.  Solid Fastening.  These are all keys to installing high-quality, pro-looking, cabinet installation in your home or office.

When installing base cabinets for the first time, don’t get intimidated.  Just remember what carpenters and builders have been saying forever:  If you can get that first piece right, then all the others will “fall” into place.

If you mess up that first step, though, look out.  You’ll run into head-ache and heart-ache for the rest of the project duration. If you can finish at all, that is.

This is as true to staining a cabinet as it is for hanging wallpaper.  Let’s get started.

Tools, Materials, and Steps To Install Base Cabinets:

Step 1:  Locate the Highest Point on Floor where Cabinets are to be Installed

Remember up there ↑ where we said, the first step is the key?  Well, here it is.  If you have an uneven floor then you’ll have uneven base cabinets.

They’ll appear unlevel compared to the upper cabinets and it will bother you.  Plus, stuff will just roll everywhere.  Can you say “mess”?

how to install base cabinets

Find the highest point on the floor where you’ll be installing the cabinets by using your laser level.  This is where, later on in the process, you’ll be shimming cabinets to the height you just noted.

Step 2:  Draw a Level Line on the Wall at a height of 34.5 in. ABOVE the highest point on the floor

Note: The height accounts for a finished floor and a standard cabinet height (36 inches) that you’re installing.

Step 3: Mark Cabinet Locations

Denote the spots of the different cabinet units you’re installing by drawing vertical lines to the floor.  Then use a stud finder to locate the studs along your cabinet wall and mark those.

Note:  You’re going to need these marks, so make sure you mark them clearly and ABOVE the top line of the cabinet.

Step 4:  Starting with a Corner Unit if applicable.  If not, then choose either end

Set the base cabinets against the wall where you plan to install  Add shims beneath in order to make the top edge of the cabinet hits the first horizontal lines that you drew.  (Step 1)

If your wall isn’t at a 90-degree angle to the back end of the cabinets, then you may need to fill gaps with filler strips at the stud locations. These are thin pieces of wood material like this here.

At the end of this step, drill and countersink pilot holes and use the 2.5-inch screws to secure the cabinet (through the filler strip if used) to studs.

Step 5:  Continue to Cabinets


Now that the first cabinet is done you can move on with the adjacent cabinets in the same way.  Shimming when necessary

To make sure you get a flush fit between adjacent cabinets, use a clamp to join the two correctly.  Next, drill and countersink 4 pilot holes and attach screws.

Repeat steps 4 and 5 with remaining cabinets.

Step 6: Attach and Install Drawers and Doors on Base Cabinets

You’re there!  The fun part!  Now that you’ve installed the base cabinets, go ahead and finish the job off by securing doors and installing drawers onto tracks.  (Attach handles and knobs if not already secure)

Additional Considerations Needed When Installing Base Cabinets

  • Make sure walls are in good shape before starting and, if not, repair beforehand.  Also, finish all electrical and plumbing work in the room that your installing cabinets prior to base cabinet installation.
  • Pain the cabinets prior to installation so that you can still turn and move them around easily.
  • Install kitchen flooring (or bathroom flooring…wherever the cabinets are going) prior to installing cabinets.  This avoids the task of having to edge flooring around cabinets in the future.
  • Before installation, mark the locations of pipes and electrical boxes and then cut and cut holes for them.
  • When using filler strips, be prepared to do some fitting.  Walls are not always built perfectly and some won’t be plumb.  You can use a sander or grinder to cut down the size of the filler.

The post How to Install Base Cabinets: Get Your Shimmy On appeared first on Top Laser Levels.


source http://www.toplaserlevel.net/how-to-install-base-cabinets-get-your-shimmy-on/

Tuesday, December 24, 2019

Bosch Self-Leveling Rotary Laser Level Kit Review

Bottom Line Up Front: This is the ultimate in laser level kits.  The Bosch GRL300HVK is a versatile, accurate, durable, and warrantied precision tool.

Pros Cons
Lots of choices for rotation speed and scan angle variations. May have some items you are not familiar with if you’re a beginner
Remote Control Included
Durable
Kit case included for protection and organization
Stout battery life


Find Out More

Best Rotary Laser Level for Construction Bosch Self-Leveling Rotary Laser Level Kit (GRL300HVK)

Get the Best Price

Bosch has been leading the way in the scope of home and outdoor construction tools for a long time.  Their laser leveling tools and measurement technology is amongst the best in the business.

Bosch technology has among the most accurate and most durable laser levels on the market and it can be used for a variety of applications.  This full-kit, though, is what makes the self-leveling Bosch the best laser level for construction. Why?

Grade match is very important during construction projects. Laser levels with grade match have the capability to tilt and level with according to the grade that you want.

What is this Bosch Laser Level Best Used for?

Indoor use for things like installation of drop ceilings, chair rails, temporary walls, and trim work.  Just use the wall or ceiling mount and controls.

Used for outdoor work a great deal, but you’re most likely to need a laser detector so that the laser is easier to see.  This kit comes with a receiver and protective glasses.

This is a great kit for any of the following outdoor projects:  grading a yard or field, construction, and much more.  This kit comes with a grade rod.

Complete Bosch Laser Level Kit

There’s nothing that this kit isn’t read for.  A remote, wall mount and a very sturdy case make this the laser level that’s worth buying this time around.

Find Out More

2-Year Limited Warranty

FAQ

Q: Can you use this laser level outside?

Yes, the Bosch is made to be used primarily outside and in ambient light.

Q: Does it come with a carrying case?

Yes.

The post Bosch Self-Leveling Rotary Laser Level Kit Review appeared first on Top Laser Levels.


source http://www.toplaserlevel.net/bosch-self-leveling-rotary-laser-level-kit-review/

Monday, December 23, 2019

How to Build a Temporary Wall Easily

At some point, most of us do it. We start to get cramped, or “edgy” and bored with our space. At other times, our needs simply change. If you can’t go on with your space is laid out, building a temporary wall might be just your answer.

Renters have been leaning on temporary walls to meet their apartment or home space needs for decades. If you’re living in less than ideal conditions, need a private space, or want to create separate bedrooms for kids, a temp wall construction project is worth pursuing.

Since the temporary wall doesn’t tie into the home framing, it can be easily removed with minimum trouble or mess.

You don’t have to wait for a large savings account or a remortgage to add some office space, an extra nook, or an entire room to your home. Check out our simple tutorial and steps to build a temporary wall.

Disclaimer: Check local building codes before you start any building project at home. Pay particular attention to relevant stipulations. If you have any questions, contact the office in charge of your town’s building and municipal codes.

Tools and Materials Needed to Build a Temporary Wall

(Check on Amazon!)

Step 1: Put Sill Seal on All Surfaces the Temporary Wall Will Touch

If you’re new to DIY projects, or even if you’re seasoned craftsmen, you may not be familiar with sill seal.

It is a 1/4 inch thick foam that performs two vital functions for us, here:

First, it protects the floors, walls, and ceiling that already exists from getting damaged.

Secondly, (and more importantly) the sill seal will provide the pressure that is required to secure the temp wall where you position it.

Step 2: Cut two 2x4s to the Desired Length of the Temporary Wall

These are known as the “plates” and they will make up the top and bottom margins of your wall.

Step 3: Cut two MORE 2x4s so that they are 3 inches Shorter than Ceiling Height

Now, laser line measure from the floor to ceiling, making sure to measure twice (once for the left edge and again for the right edge of the wall) and in more than one area as heights can vary.

Subtract three inches for each measurement and cut a 2×4 to match each measured length. These are your end studs.

Step 4: Fit Vertical Studs Between the Top and Bottom Plates

Put the bottom plate over the sill seal that you’ve already on the floor. Get help from a friend, partner, or spouse to hold up the top plate against the ceiling and sill seal there.

Having an extra set of hands will allow you to wedge the studs into place.

(Don’t forget that you should have sill seal against any touching walls where you are placing the vertical beams.)

If either stud needs some tapping into place, then don’t hesitate to give it some taps with a hammer.

If the studs are too tall, just trim some length off with your circular saw. It’s better to go easy here and try and trim little by little.

Step 5: Nail/Screw the Outside Studs to the Top and Bottom Plates

So, you’ve got the wall perimeter down, now you just have to secure the end studs to the plates with nails or screws. It doesn’t matter which you’ve decided on but keep in mind that screws are easier to remove.

For more stability, for say a door or if you have kids or big dogs, it’s better and safer to secure the top plate to the closest ceiling joist.

Step 6: Place Additional Studs for Support and Attach Drywall

Install the remaining studs at normal intervals of between 16 and 24 inches. Also, if you’re trying for noise reduction in the wall, now is the time to add your insulation.

Lastly, hang the drywall panels on to the frame and studs with screws for later convenience.

Step 7: Finish the Wall You Want!

If you want or need just a basic, drywall finish then you’re done. Here’s where you can add primer, surface paint, baseboards, moldings, and of course, decorations.

You can easily make a temporary wall blend seamlessly in with your permanent walls. It just matters how much you want to add and, eventually, may need to take down.

The post How to Build a Temporary Wall Easily appeared first on Top Laser Levels.


source http://www.toplaserlevel.net/how-to-build-a-temporary-wall/

Sunday, December 22, 2019

Makita Self Leveling Cross Point Laser Level SK103PZ Review

The Makita SK103Z Cross Point Self Leveling Laser Level is an “all in one” Solution to all of your Early Construction and DIY projects.

Typically used in the early parts of construction projects, your measurement needs will vary.  Precision is NEVER not necessary, though, and that’s where the Makita comes in.

This tool combines all of the laser leveling chores you may need into this one product.  If it’s within 50 feet need for measurement, this tool is going to get it done for you.

You name the duty and the Makita Self Leveling Cross Laser can help out:  All needed reference lines are provided.

Disclaimer:  We’ve reviewed a number of other quality laser levels.


Makita SK103PZ Laser Level Features

  • Accuracy:
  • Horizontal Line:  +/- 1/8 inch at 30 feet
  • Vertical Line: +/- 1/16 inch at 30 feet
  • Points: +/- 1/8 inch at 30 feet
  • Fast Set-Up and Leveling:  Stability achieved in 3 seconds via enhanced self-leveling capability.
  • Built to Last: Built-in pendulum lock for laser diode protection when in transport or packed.
  • Flexible:  Laser line fan length goes well past 90° and provides 180° horizontal line as well as 120° vertical line.
  • Best in Class Visibility:  The laser is a Class II 635 nm in even moderate or light ambient environments.
  • Works on Uneven Surfaces:  Self-leveling capabilities that easily handle up to 4° of slope.
  • Easy to Operate in Many Modes:  5 mode functions to conserve power by only using necessary functions for certain operations.  Only a 2 button user interface!
  • Bracket:  Built-in bracket allows for easy attachment to a tripod.
  • Detection up to 200 feet when in Pulse Mode and battery up to 35 hours!

Get All the Info


Makita also has an option for an entire laser level kit with tripod. Check here to see if it is still available.

Drawbacks

The Makita only uses a red diode for a laser.  While red is the basic laser level color and it is pretty easy to see, during brighter times you’ll would usually opt for a green diode. The cost is kept down here by going red.  Read more about Red vs. Green lasers.

FAQ

What Is Pulse Mode in Makita Laser Levels?

Pulse mode can extend runtime up to 35 hours. It’s like a cheap laser show at the Science Museum…but very underwhelming.  This is best used in darker situations as it drops the overall brightness but keeps your level going longer.

Is the Makita SK103PZ Durable?

The entire laser level is protected by a rubber outer coating that provides protection from some impacts, but you’ll want to check the calibration if it gets knocked off a sawhorse and hits the floor.

Will Water and Dust Affect the Laser Level?

The Makita laser level has an IP54 rating which means it’s moderately protected from dust and water.

  Get All the Info


The post Makita Self Leveling Cross Point Laser Level SK103PZ Review appeared first on Top Laser Levels.


source http://www.toplaserlevel.net/makita-self-leveling-cross-point-laser-level-sk103pz-review/

Thursday, December 12, 2019

Why Are Green Laser Levels More Expensive than Red?

In case you didn’t notice as you browse our laser level recommendations, the green lasers are more expensive than the red ones. Up to 20% more in most cases. But why are green laser levels more expensive? 

Let’s take a closer look.

It wasn’t long ago when red laser levels ruled the roost.  It didn’t matter what you were doing; home DIY, construction, electrical work, HVAC and more.  The red laser was the be all of the laser measuring world.

Green laser level or Red?

Now, more and more people are switching or choosing green laser levels.  First things first, though: Accuracy is a NON-FACTOR here.  There is NO difference in accuracy potential or red or green.

Battery Life and Power

Green laser levels are somewhat easier to see in daylight than their red counterparts.  Even then, though, only marginally.

Green lasers DO boast better visibility and even more range BUT that also means that they eat through batteries like Cookie Monster through a Keebler cache!

And what happens when the battery drains quickly? You got it!  Those “easier to see beams” start to weaken and make it difficult to spot in the daytime.

This is a push.

Visibility

Green beam levels are SUPERIOR for doing jobs that are under ambient light.  Think pavement, drywall, plumbing, and construction.

The green diode puts out greater power and makes the beam more visible even in light. It seems to have a sharper, crisper line and point.

Laser wavelength and power determine it’s visibility.

As long as your batteries stay strong, the closer the wavelength is to 555nm than the easier to see.  Green lasers sit at between 560nm to 520nm. This makes them 4 TIMES brighter than traditional red.

What is do nm and mW mean in Lasers?

The “nm” stand for nanometer which is a measure of length.  For lasers, mW describes the power of the laser.  nM refers to the wavelength of the laser.  Some wavelengths are difficult or impossible to see to the naked eye.  This makes green lasers superior.

Visibility still depends on:

  • Ambient light
  • Surface type
  • Battery charge

visible laser light spectrum

Range

This is sort of variable depending on not only the quality of the laser level but also factors such as refraction, polarization, scattering, reflection, dispersion, and wavelength.

However, in my opinion as a layman, I can pretty much conclude and tell you that green lasers are easier to view from a longer range than red.

Indoors, red lasers will typically have a range of 20 to 30 feet while a green laser can reach 50 to 60 feet.  (DeWalt)

But there’s a hack you can use to make your red laser reach as far and work as well for you as a green laser level: Laser Detectors.

And…getting a laser detector for your red laser level will be less expensive than just buying a green laser.

When it comes to outdoors, the green laser level is an easy winner at up to 60ft or beyond visibility.

Price

Finally, the big question:  What’s the difference in price?  Well, I’ll tell you, I’ve never met a green laser level of a certain quality that is cheaper than a red one of the same quality.

The average cost increase for green over red laser levels is about 20% more.  Why? It’s just more expensive in regards to parts for green lasers.

Bottom Line:  Green Lasers are Better BUT more Expensive than Red Lasers.

Which color laser level you choose is going to be based upon your certain situation.  I hope we’ve helped you figure out why green laser levels are more expensive than the red ones.

If you’re mostly working in smaller, inside spaces or if budget is a concern then you’ll want to opt for red laser levels over the green.


The post Why Are Green Laser Levels More Expensive than Red? appeared first on Top Laser Levels.


source http://www.toplaserlevel.net/why-are-green-laser-levels-more-expensive-than-red/